For the sake of transparency – I run a seed ball business called Seed Balls Australia, which is still in its infancy. Rest assured, I am not trying to sell you anything, I’m just really proud to be able to share my knowledge and affection for such a fabulous natural product!
I sell my seed balls at markets and have them stocked in a number of shops. I have also had them purchased for party bags for both children’s and adults’ parties. I have dressed them up beautifully for wedding favours and am currently working on a range of funeral seed balls. As part of my work with Jindalee Ag, my seed balls have been used in roadside revegetation, landscaping projects on new housing estates, civic works and mining regeneration works. I use open-pollinated non-GMO seeds and have used flower, herb and native seeds with excellent results.
I genuinely believe that seed balls are a fabulous way of planting and this will explain why.
Seed balls have been used for centuries as a means of sowing seeds. The Japanese farmer and philosopher Masanobu Fukuoka used them to reclaim desertified land (land degraded by poor farming practices) in rural Japan. In alternative agriculture, Fukuoka is very well known. Fukuoka wrote about his use of seed balls in his books “One Straw Revolution” and “Sowing Seeds in the Desert”. Fukuoka used the seed ball method to sow all his crops including rice and wheat, coating each seed in compost and clay prior to distributing them in his fields and paddies. His yields were dramatically increased using this method.
The benefits of using seed balls to plant are many and varied and include the fact that you lay them on top of the soil rather than planting them, so no digging is required. The clay protects the balls until there is enough rain (or water from a hose or irrigation system) to penetrate the balls and stimulate the seed to germinate. The seed is protected from rodents and foraging animals, and for added protection, they can be coated in cayenne pepper or chilli powder before they are dried. The seed will sit dormant until the weather conditions are correct for germination. They are not likely to be blown away in high winds so suit exposed sites. Did I mention that you can just throw them in the garden or sit them on top of the soil in a pot? The balls can be used to plant on sloping sites as they can be tossed onto the site -you can even use a slingshot to scatter them. Imagine the fun a group of kids (or big kids for that matter) could have in the name of native regeneration. I can see groups of Scouts out in National Parks scattering seed balls as directed by Landcare.

In Kenya there is an ongoing program of Jungle regeneration with indigenous trees and grasses, using seed balls. The balls are made by hand giving employment, then they are spread throughout specific areas by a number of different methods. The program works with schools to encourage and educate young people in their environment. I believe slingshots are used in this part of the program. The slingshots are made specially with the top of a plastic soft drink bottle (with the lid still in place) where a number of balls can be placed and shot off at the same time. The balls are also scattered using drones, helicopters and planes to reach less accessible and steep terrain. The program began in September 2016 and since that time over 7 million seed balls have been spread. Charcoal is used in Kenya as the binding agent rather than clay. The balls are also available for purchase to other East African countries for revegetation programs which provides further funds for the program.
Seed balls have been featured on both Gardening Australia and Better Homes and Gardens in the past year. An internet search or a search on Pinterest will come up with hundreds of ideas and suggestions.
Seed balls can be made from compost and Papier Mache or compost and clay. I use the compost and clay method myself.

These balls were made using air drying clay which gives quite a decorative finish and achieves the same outcome but takes much more work and is more expensive.
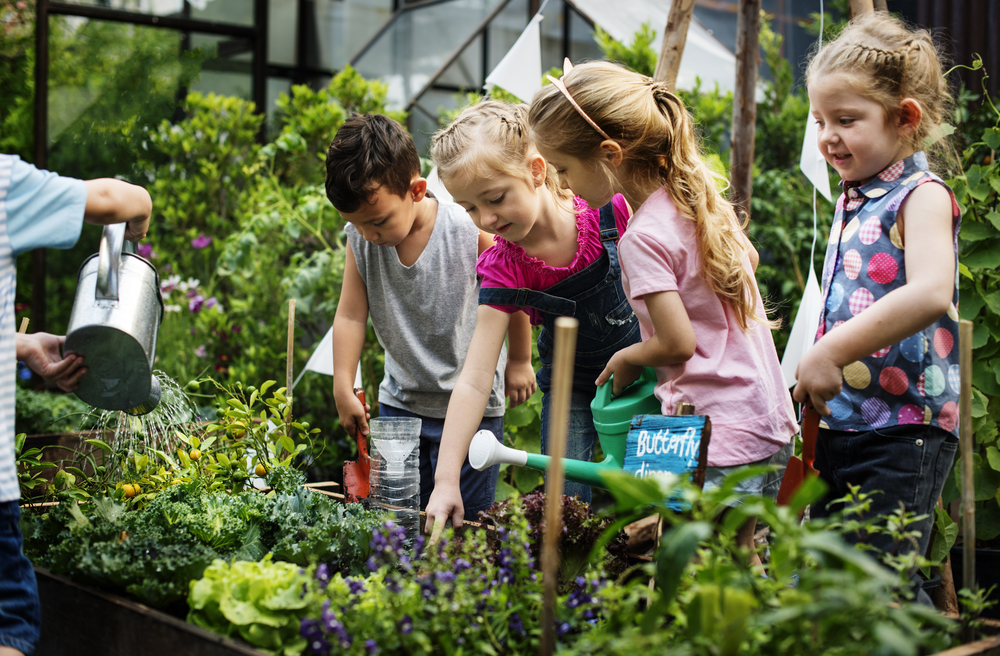
Children love making seed balls (who doesn’t like a nice messy and very tactile activity). After drying the balls, the spreading of them is another fun activity with children. They can then monitor the changes in the balls over a period of time.
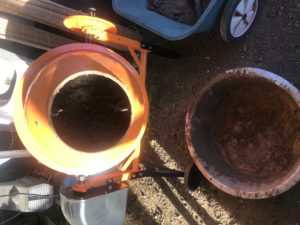
My production of seed balls is on a much larger scale but still involves each ball being hand made. I start my process with clay that comes from my property so it requires a bit of digging out. Jindalee Ag’s Certified organic premium compost is my choice for the compost component. It is an excellent quality product making it very easy to work with. I have used other commercially available compost and have found large pieces of all sorts of things in them and this slows down the manufacturing process for me. The clay then goes into a concrete mixer (never used for any other purpose) along with compost and water and it mixes for several minutes until I have deemed it has reached the ideal consistency. The mixture is then poured into a very large metal bowl and kneaded by hand to remove any small lumps. Once lumps are removed the seeds are embedded and the balls rolled. In summer drying happens in the sun and takes just a couple of hours. In winter the process occurs in a Dehydrator at a very low temperature for 3 hours.
Overall, seed balls are easy and fun to make and can be very cost-effective, especially if you grow and gather your own seeds. The germination rate from seed balls in my experience is excellent. I have always liked planting from seed but have not always had great success with germination until I started using seed balls. Making seed balls makes a great school holiday activity. Maybe child-made seed balls could be added to gifts this Christmas.


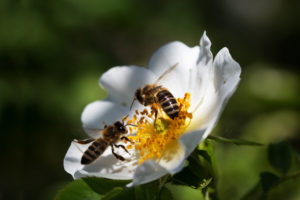
Last week I talked about bees as they deserve a post of their own. It has been reported that every fourth bite of food you eat is there due to bees. Personally, I think every bite of food we eat (unless you are eating synthetic manufactured foods) is dependant on bees. We should all be planting at least a small area of habitat for bees but don’t forget the other beneficial insects too.
This week, I am looking at other beneficial insects. All insects have their place in the world (I don’t quite understand the Mosquito’s place in the world but there must be one) and if any one insect is removed completely then the whole insect ecosystem is thrown completely out of whack.
If you have an insect attack in your garden there is imbalance somewhere. If your soil is healthy you will grow strong healthy plants. Soil needs attention at least twice per year. I attend to my soil regularly by feeding it with mixtures I make myself from weeds, nettles and manure, as well as applying compost twice per year. When I am resting beds, I apply manure and mulch them heavily with straw or ruined hay. By paying careful attention to the soil I tend to have strong healthy plants and little or no insect attack of any significance. I am not saying by any means that I don’t have bug attacks on plants, but they tend to be minimal and I don’t worry about them. Having said that I think I have now jinxed myself and will have a catastrophic attack in the near future.
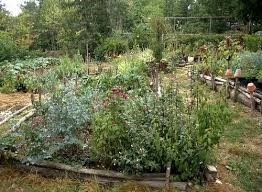
By not planting monocultures of plants but rather mixing things up you confuse insects. I love the look of market gardens with neat rows of plants all growing alongside each other but in reality, this type of gardening relies upon pesticides. There is far less work in pest control if you grow your plants all mixed up.
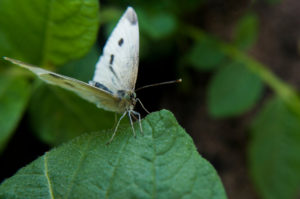
Cabbage moths love cabbages, broccoli and cauliflower (Brassicas) but if you have other plants growing around your brassicas you will confuse the moths. If your plants are strong and healthy, they are also less susceptible to attack. A simple way of confusing Cabbage moths is to cut out a butterfly shape from white plastic, an empty yoghurt or sour cream container is perfect for this and attach it to a stick so it hovers above your plants. The moths are territorial and won’t bother to attack plants already being eaten.
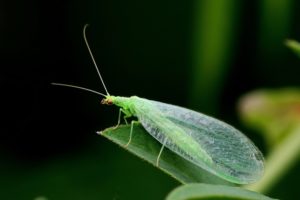
Lacewings are an insect that provide great services to gardeners. They prey upon Aphids and other soft-bodied insects that feed on your plants. If you have lacewings in your garden, you have a great ally on your side. Plants that attract Lacewings are Fennel, Alyssum and Daisies, all great plants to have mixed into your garden as they also attract other beneficial insects and are very attractive plants in their own right.
Ladybirds are another great worker in the garden. They are cute and kids love to find them too. They also inspire some people to instantly start reciting verses about Ladybirds! Ladybirds love Aphids so if you have an aphid infestation you are in need of some ladybirds. The same plants that attract aphids (Roses) will attract Ladybirds.
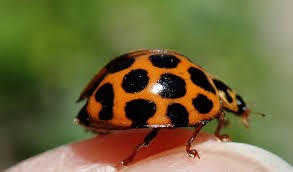
There is also a 28-spot ladybird that is not so beneficial as it will actually eat your plants. They are a large insect, orange in colour and have 13 spots on each wing (someone was either very poor at maths or couldn’t count when they named this ladybird.). They are particularly attracted to tomatoes, potatoes and other plants in the Solanaceae family, as well as beans and cabbage. If you see ladybirds on damaged leaves of these plants, they may well be 28-spot ladybirds. The easiest way to control them is to pick them off by hand and have the chooks deal with them.
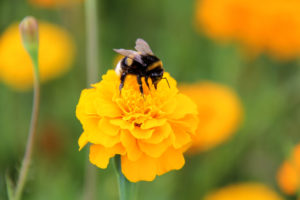
The best way to attract beneficial insects to your garden is to have a large variety of flowering plants mixed in with your vegetables. Marigolds, Borage, Rosemary, Lavender, Daisies, Alyssum and Cosmos should all be on your lists to include in your vegetable gardens. Leave some weeds in place and provide some areas that insects are able to use for living and breeding. Some rocks piled up in a corner, a hollow log in the back of a bed, they don’t need to be large and spectacular but they provide habitat for the bugs and animals we need to encourage into our gardens.
Bees are the building blocks that the world is built on.
It has been prophesised that if bees disappeared from the earth, humans would also cease to exist. The length of time it would take for humans to become extinct has not been precisely determined and would probably depend on factors such as management of food stocks at the time of the catastrophe (this could be the subject of a dystopian novel!) behaviours of different countries and the list could go on and on.
If the humble bee was not around to pollinate our fruit, vegetables and crops, we would starve. Not even Trump and Morrison sending missions to Mars would save us. In my humble opinion, the money to be spent on trying to colonise Mars would be better spent on research into our current issues including the diseases that are threatening to wipe out bee colonies worldwide. Arguments could be mounted that crops could be artificially fertilised and food could be synthesised in some laboratory somewhere and these practices are already being researched and are in existence, but the current world population could not be maintained and what would our life look like under this system (I am sure there is a dystopian novel out there that covers this). I know how I would rather live.
Many individuals and organisations globally are working to prevent further damage to bee health. I attended a forum in Albury earlier this year where Toni Childs (the sultry-voiced singer from the 90’s) spoke to Bee Keepers about her organisation that aims to increase bee health. There are an enormous number of organisations with similar aims. A google search of bee organisations will bring up a number of organisations from local Bee Keeper Associations to global organisations. There are a number of organisations that use social media as a fundraising platform through sales of bee specific jewellery etc. There are mountains of research and scientifically informed strategies out there so do a little bit of research and go with what you think will make a difference.
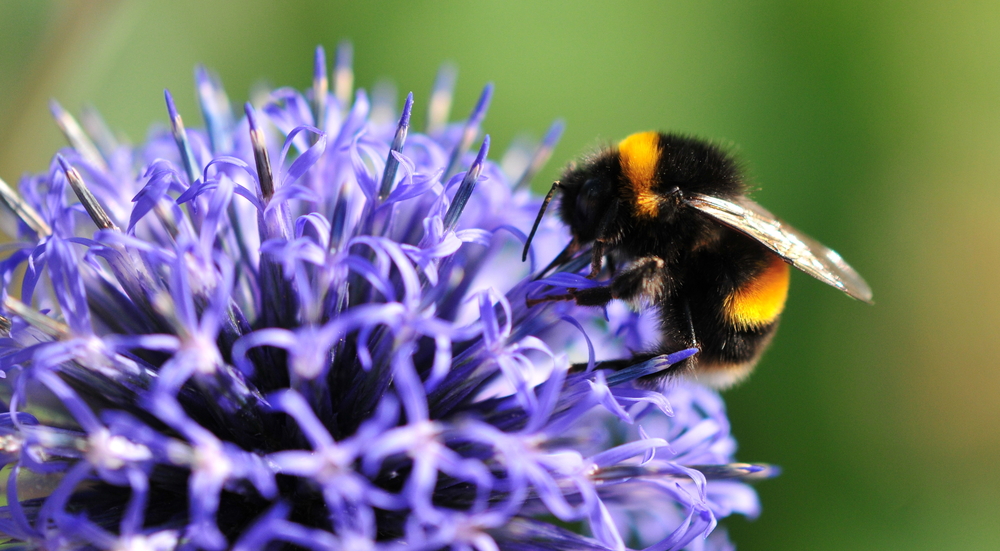
Honey Bees are not the only type of bees that are in danger and we need to also be aware of native bees, both those who live in colonies and those who are solitary. Many native bees are indigenous within a specific area so it is worth doing some investigations into your own region to determine what types of bees you have potential to host at your place.
Personally, I don’t keep bees as my husband has a severe allergy to bee stings (he is aware that when a hive appears on our land it is a not so subtle message that his days are numbered!) so I see my role as a bee warrior and habitat provider. A common thread throughout this JAG Blog is that we don’t have the power as individuals to influence governments and policy-makers, but we do have the power individually to alter our own small environment. There are hundreds of things we can do to improve the plight of local bees; I will outline a small number here but there are many more.
Possibly the most obvious thing we can do individually is to reduce or totally remove the use of pesticides in our own environment. I don’t like flies and European wasps but I can live with them and there are a range of other strategies to reduce the numbers. I use natural baits for fruit fly around my fruit trees as I believe that is a responsible thing to do. The use of pesticides and herbicides can be a very divisive and inflammatory topic so I will not get into it too deeply here, suffice to say do what you think is best in your environment.
Water is essential for the survival of bees. Providing flat dishes of water throughout your garden that you refresh regularly throughout the hot summer months is beneficial. Placing rocks, glass beads or small pieces of wood in the water give bees (and other insects such as butterflies) a place to perch as they drink, reduces the chance of drowning. I have read that bees will travel up to 5 kilometres in search of water sources so even if you don’t have beehives near you there may well be native bees and others that you are not aware of who can use a source of water.
Food is the other essential for bees. Over the winter I noticed that the rocket that I left to go to seed was attracting large numbers of bees along with the Calendula I planted specifically to attract bees and other beneficial insects. Plants that have gone to seed may not look overly attractive in a neat and tidy garden (a perfect excuse to have an untidy garden) but they have their own beauty and will provide you with seeds that you don’t need to pay for that are adapting to your specific environment. I follow Permaculture Principles within my garden so I don’t plant in neat rows and I allow most plants to go to seed so that I always have surprises popping up in the garden.
Plant a wide variety of flowering plants that flower at different times so that you always have something flowering. Perennials such as Lavender and Rosemary are highly attractive to bees along with some plants that people classify as weeds such as Dandelions. Any and all flowers will attract bees to varying degrees. If their favourites aren’t available, they will use whatever is available. Those gardens with neatly cut lawns and herbaceous borders are the ones that are deserts for bees. Daisies in your lawns and weeds in your borders are way more attractive but if you have a penchant for neat and tidy gardens plant some flowering bushes and provide watering spots. Apparently, bees will travel up to one kilometre for food so you don’t need to have your own hives to be providing food for bees.
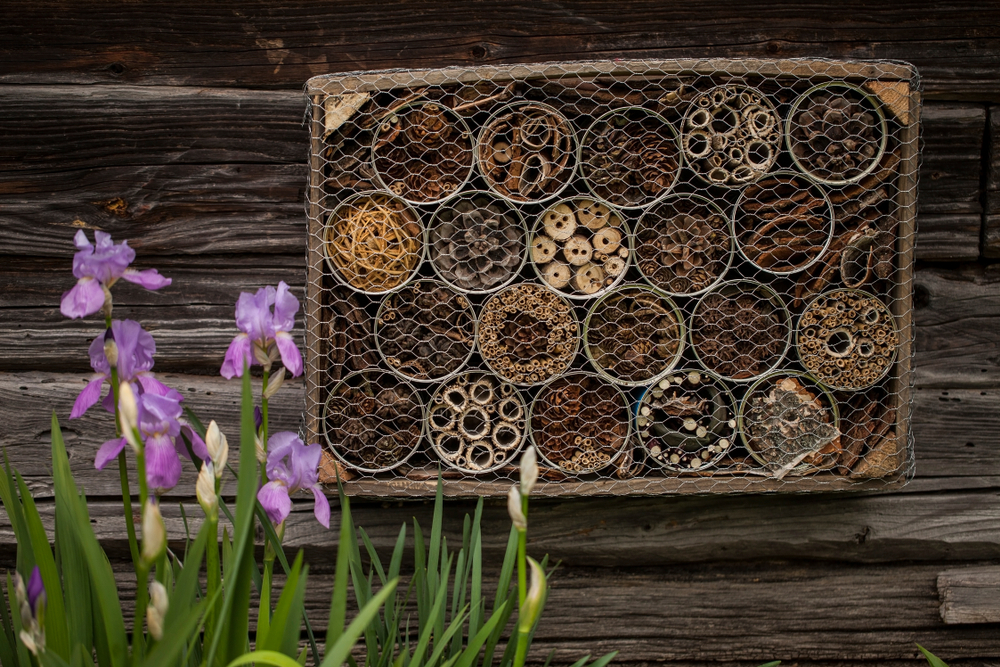
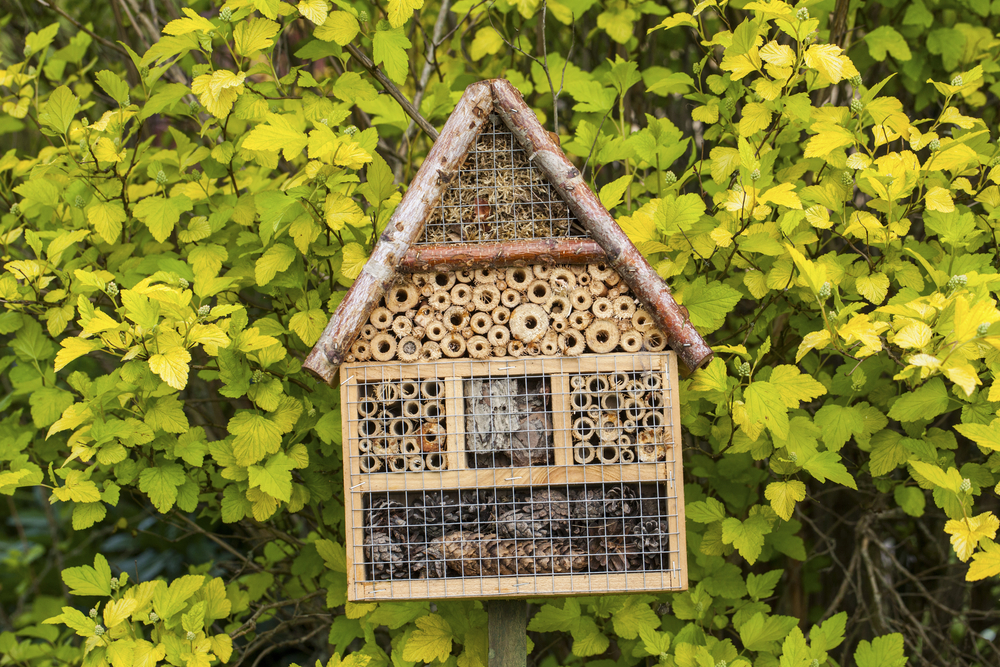
Shelter for solitary bees is as important as the provision of habitat for other native species. Manufactured insect houses are widely available currently and make a great gift for those who are interested in gardens and wildlife, but you don’t need to purchase one as they are quite simple to construct. A piece of untreated timber with some holes drilled (slightly upward trajectory) into it and mounted on a wall or fence will do the job. A terracotta pot with lengths of bamboo crammed into it and left on its side in a sheltered area of the garden also provides habitat.
Making just one change to provide for bees is fantastic, focussing on the provision of habitat food and water by a small number of us is amazing. Imagine if each one of us did one thing the change we could make.
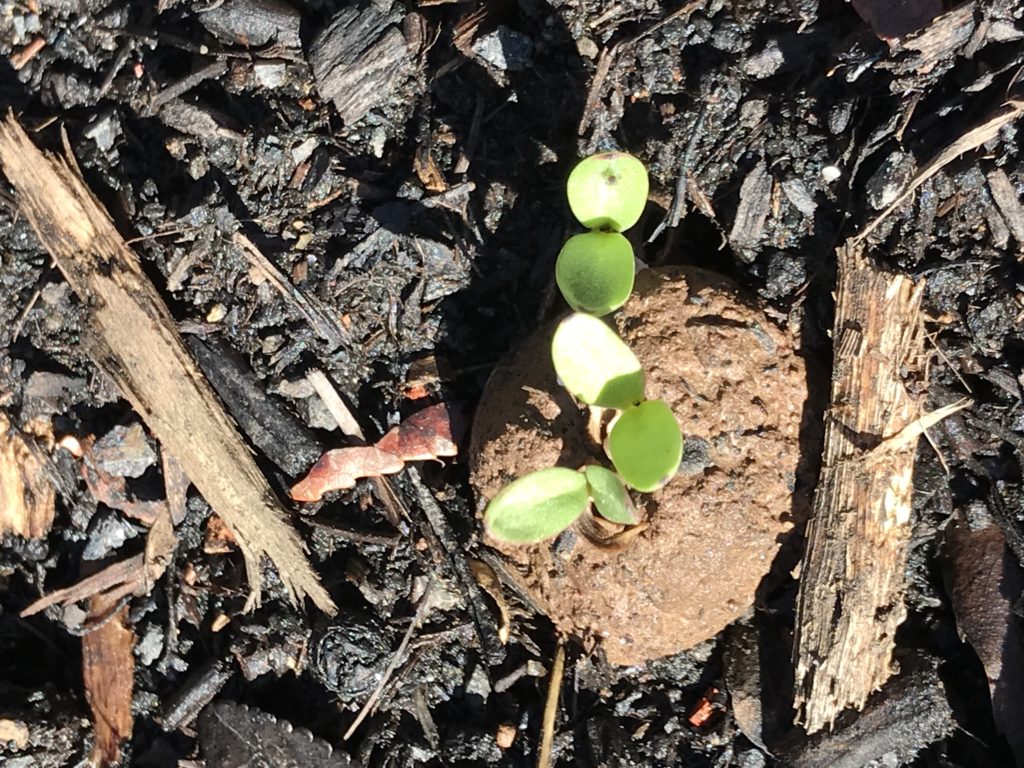
The Woolworths Discovery Garden current “Giveaway” has created a renewed interest in growing plants for children. We have certainly gathered a few and have had a very good germination rate with the seeds. The pots are quite small and need to be planted out fairly quickly and in my opinion, some of the seeds such as carrots and radish aren’t particularly suitable for transplanting. For some of the seeds we have not used the pots but instead planted directly into large containers. The pots can be composted or saved for future use. I love that there is something that gets kids excited about being outside away from screens and spring is such a fabulous time to be doing this. Anything that is going to get kids interested in gardening is wonderful and they have to be better than little bits of plastic that end up in landfill. Let us know what you think about them.
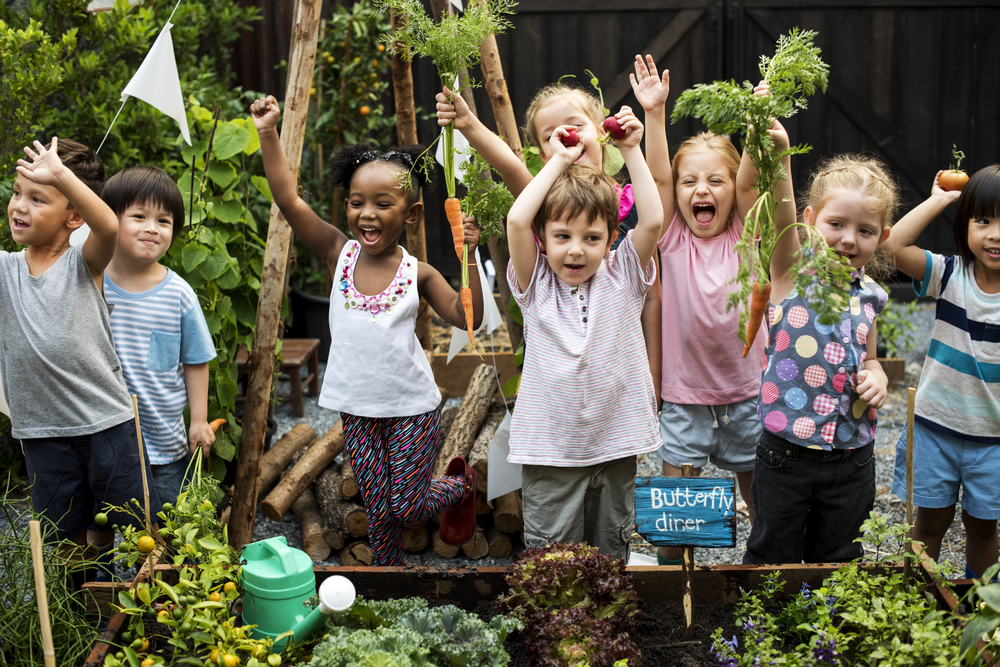
Gardening with children can be a challenge as well as being fun and rewarding. Over the past two years, I have been volunteering in a primary school garden, we call it ‘garden gang. I have had to modify my expectations somewhat as the garden belongs to the children and not me. The kids often want to bury seeds way too deeply or stomp the soil down so hard that nothing would ever be able to break through the compacted crust, I bite my tongue and let them learn through their mistakes. We have plants popping up all over the place and the joy the kids get from watching them grow and then harvesting them is fabulous. I think at times I am not overly popular with the other parents as their children eat all sorts of vegetables that they will not try at home. I have also been told that they have commented to their parents about the way their vegetables are prepared at home. If they have grown them, they tend to be much more adventurous with tasting.
We have a day each term where I cook up some produce and the gang get to try it, numbers are always about double on food day. This term was pumpkin themed as we needed to use up some of our massive haul from last summer. We had pumpkin soup, pumpkin muffins and pumpkin chocolate cake. In the summer term we had Zucchini slice, muffins and chocolate cake -I am seeing a pattern here and may need to try something else next term. The last couple of weeks have seen kids crunching on radishes straight from the garden after a splash under the tap and lettuce leaves. When we planted garlic for the first time many of the kids told everyone we were planting garlic bread so of course after harvest we had garlic bread. Over the last few weeks the gang has spent time picking, washing and munching on radishes and lettuce leaves.
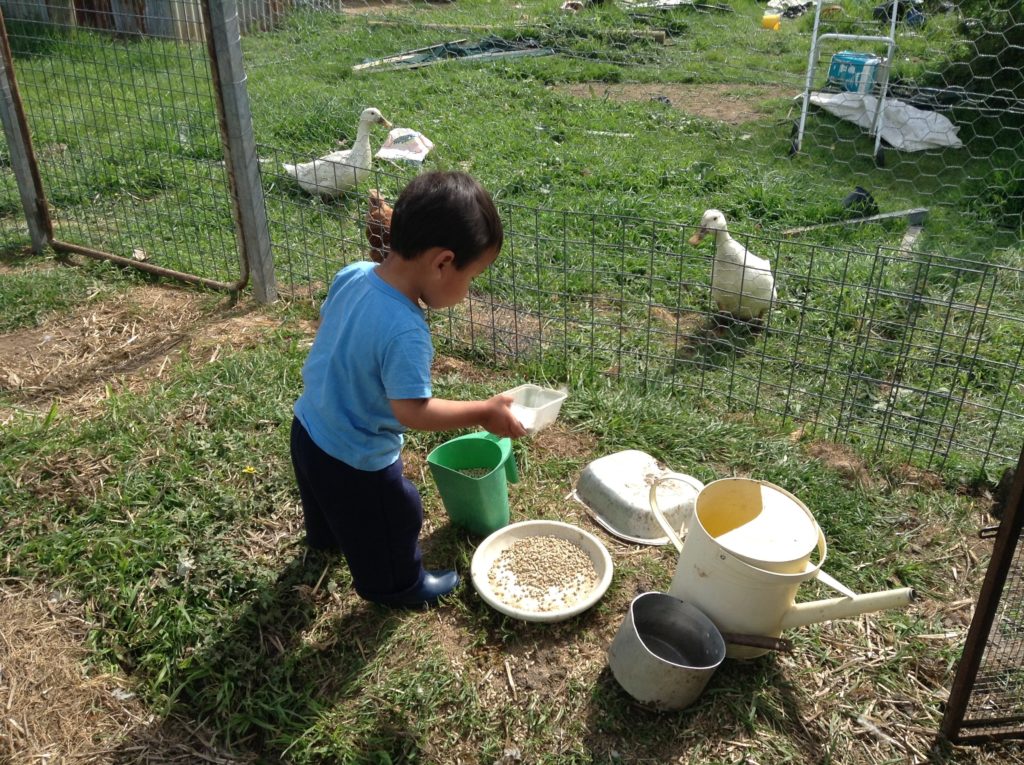
Apart from developing their taste buds the kids are learning about sustainability. We are lucky enough to have chooks and food scraps go into buckets that are fed to the chooks and we use their pooh (the chooks not the kids) to make pooh tea for the garden. The boys in particular love our bin of pooh tea -stinky smells and little boys! We have a worm farm and a compost bin that the kids raised the money for. They are very enthusiastic about what comes out of the bins. Finding bugs in the garden is also a very popular activity and we often have discussions about good bugs and bad bugs in relation to our vegetable growing.
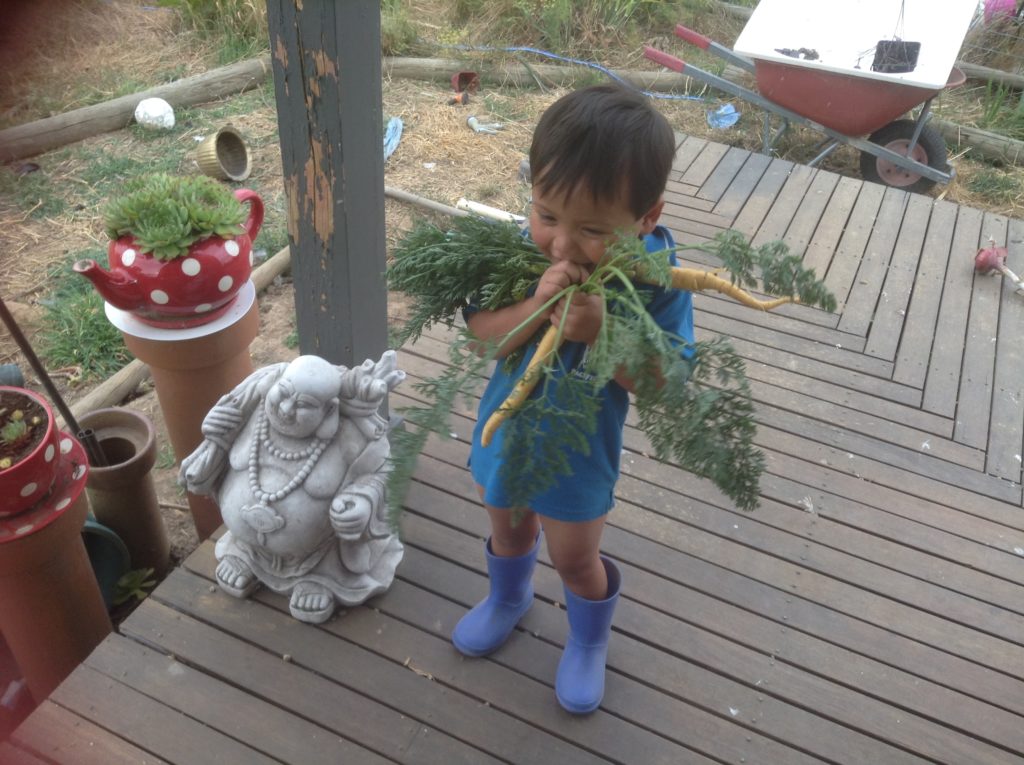
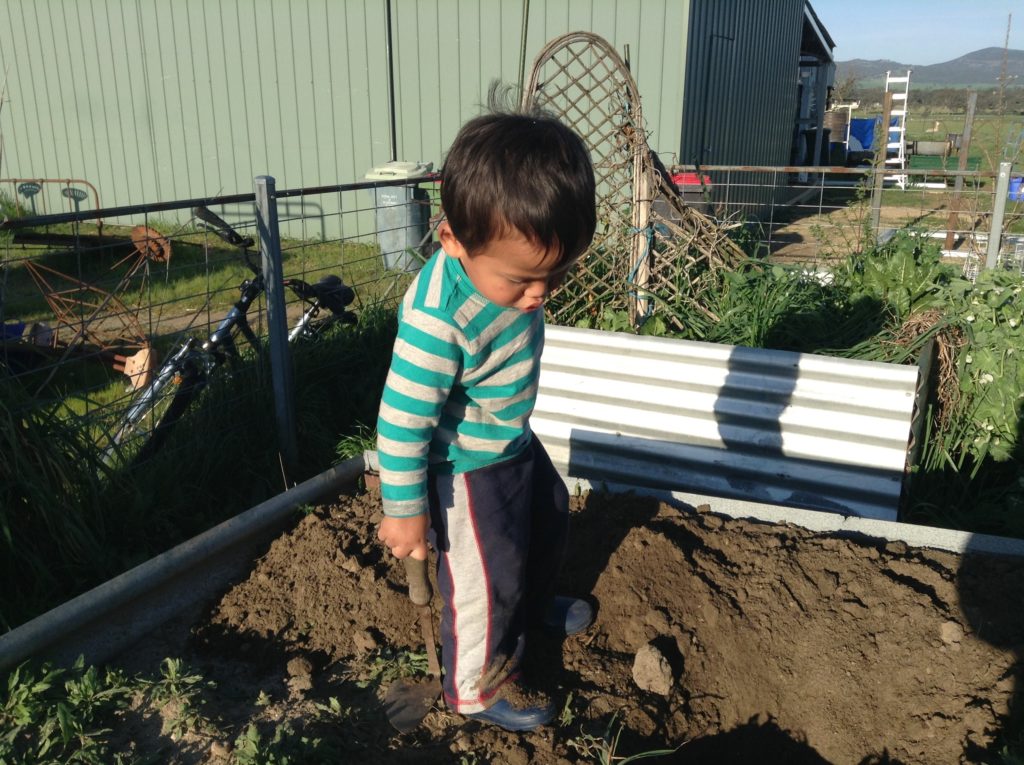
I have a seven-year-old son – yes, I know I don’t look anywhere near the age to be the mother of a seven-year-old but there you go. My little man spent his first 22 months inside, isolated from other children (there were good reasons for this). When he came to us, he had never walked on grass, picked a flower or seen the moon. We needed to do a lot of therapy and the garden was the perfect place for that to occur. We worked on fine motor skills with digging, transplanting seedlings and sowing seeds Gross motor skills were developed through water play and moving around on different surfaces. We went berry picking just days after his arrival and I will never forget the joy (and lots of berry juice) on his face when he sat beside a blueberry bush and ate blueberries, some green ones made their way in too but he didn’t seem to mind. Language skills were developed through talking about plants and insects and naming them all.
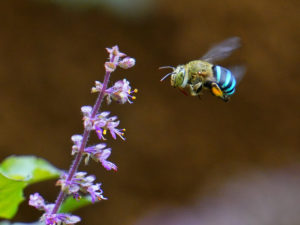
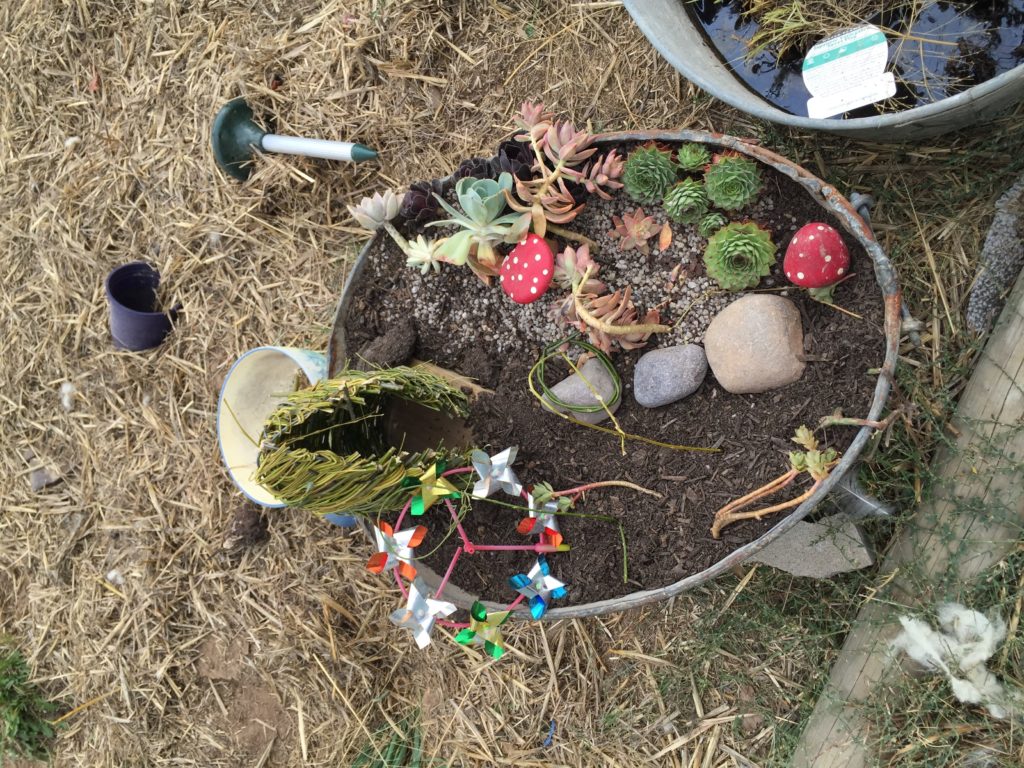
I now have a child who loves being outside in the garden. He has 2 fairy gardens (one is guarded by a toy gorilla!) and spends hours rearranging them. He has built lizard habitat areas and inspects out insect habitat area regularly to see what lives there. He can’t wait to see his first blue-banded bee when they arrive in summer. On the first day of preschool they found some curl bugs in the garden and he proudly announced to his peers that they were Paddock Cockchafers -yes, I am that mum.
Take your kids or grandkids out into the garden every chance you get and allow them the freedom to discover the environment for themselves. Yes, they will get dirty and yes, they will get wet, but they will also make up fabulous games and ask you lots and lots of questions and no because I said so won’t cut it as your answer. The learning that occurs in a garden is amazing.
Going on a snail hunt at dusk after rain and then feeding those snails to the chooks is heaps of fun and a completely non-toxic way to rid your garden of snails! You can weave your own fairy house out of willow or suitable vines -passionfruit, grapevine and Banksia Rose all work very well, they will brown off as they dry and have a completely different look. Paint stones and write plant names on them for garden markers. Construct garden structures from bamboo. Use old pallets to build a child size potting bench. Have some fun in the garden this spring!

Friday, September 20th student-led Climate Action Strikes were held across the world. I attended the strike in Albury (my second one) and again was incredibly impressed with the young people who were leading the protest. They were articulate and informed and if they are the future leaders of the world, bring on the future.
Social Media this week has been focussing on climate change – in my feed at least. The United Nations Climate Action Summit was held in New York this week and was addressed by Greta Thunberg the incredible young climate activist. Some posts that have been repeatedly shared on Social Media this week have focussed on the fact that young people are being educated in air-conditioned classrooms, using computers for much of their learning, as well as their use of mobile phones. Somehow the fact that most classrooms have air conditioning has been attributed to the students themselves. I am yet to see a student who has managed to get a school airconditioned but if that student does exist then they must be an amazing kid! These arguments seem to miss the point that the use of technology is not in question it is the source of the power charging them that needs to be changed.
Not everyone believes that climate change is real or that we need to make changes to address it. Scott Morrison doesn’t seem to believe that Australia needs to do any more than is already being done. At a national and global level, the majority of us have absolutely no influence so what can we do?
There are any number of changes we can make in our own daily behaviour that will have an impact. Any change no matter how small must be good. If each and every one of us were able to make just a small change imagine the impact overall. I know I can’t change the government’s policies, make Trump believe climate change is real or even alter the opinion of friends whose thoughts don’t align with mine but, there are many things I can do. So, what are these things?
Throw away fashion contributes greatly to both climate change in the production phase and to the masses of waste we produce. Buying less clothes or shopping at Op shops is something that we can do. I tend to buy fewer but better-quality clothes that will last longer. I have no issue with being seen in the same few outfits day in and day out. Being clean and decently covered is what matters to me. Once my clothes are no longer appropriate for work or social occasions, they become house clothes with the next step down being garden clothes. When they are too holey for even garden wear they become dusters and rags. It generally takes about six years for a piece of clothing to go from new to rag bag in my case. Generations before us were used to living in this way, mending and darning their clothing and passing clothes down to younger siblings and cousins. The advent of cheap clothing has dramatically changed the way we live. Beautiful patchwork quilts were made from scraps of fabric that still had wear in them, nobody purchased fabric specifically to cut up into small pieces and then sew together again. My child has two pairs of shoes and a pair of thongs at any given time, one pair of runners and one pair of good shoes (usually school shoes). Again, I spend money on good quality shoes that will be grown out of rather than worn out. If the shoes have wear left in them which is not often the case with small boys, they are donated to the op-shop. If they are worn-out, they become garden planters for succulents or shoes for scarecrows. I will gladly accept used clothing from friends and if it can’t be used in our household I will happily pass it along to someone else who can use it.
Ensuring your electrical appliances are energy efficient will save you money as well as reducing your power needs. Turning off appliances when they are not in use and turning off lights and heating in rooms that are not occupied will have the same effect.
Australia should be a sea of solar panels with panels on every roof given our climate and the sunlight we could be harnessing. Solar panels have reduced dramatically in price over the last ten years. Subsidies exist in most states to assist with the initial cost of purchasing panels and ultimately the household power costs will reduce significantly. We have had solar hot water for approximately 15 years and solar panels for 10. If we were to move to a new house my first priority would be installing solar power.
Heating and cooling are things that most of us would not consider going without. There are many ways we can reduce the need for heating in particular. Wearing an additional layer of clothes, having rugs to snuggle under on the couch, using draft excluders for doors and windows are all ways to reduce the heat demands in a house. Thermally efficient house design and double-glazed windows are things to consider if you happen to be building a new house. In older houses much can still be done, ensuring you have good insulation, installing blinds and curtains and checking that your heating system is working correctly and efficiently will all help. Older houses can be retrofitted to ensure your systems are working to capacity, it takes time and commitment, but it is achievable. Going without air conditioning in the types of summers we experience is not something that I would consider but I will make sure that I minimise our needs by ensuring curtains are closed during the day to minimise heat build-up, windows are opened in the cooler times of the day for the same reason.
When replacing household appliances pay attention to the energy ratings that will be displayed on them. Buy the most energy-efficient appliance you can afford, and you reduce your power costs and save money in the long run.
Every one of us is responsible for handing our children and future generations a world that is not about to implode. I cannot recall where I heard it, but one statement I heard that really resonated with me was that we are not going to destroy the earth, instead we are destroying ourselves. The earth will heal once Humans are no longer polluting and destroying it. I would like to attribute that to someone, but do not recall who said it so apologies if it was you. We all need to step up and stop destroying the only planet we have.

I know it is only September, but Christmas is creeping up on us very quickly. Personally, I don’t understand how people get caught unprepared for Christmas, after all, let’s face it, it happens on the same date every year! One of the ways of making sure your Christmas is relaxed and fabulous is to be prepared so that there isn’t a horrible rush at the last minute.
Christmas is one of those times when we can create a mess, financial mess, literal mess, hot raving mess!
Financially the way to keep it under control is to minimise your spending by purchasing throughout the year particularly when items are on sale. Spending only what you can genuinely afford without putting yourself in hardship sounds like common sense, but millions of people put themselves into debt every Christmas. Don’t get carried away by the season spend wisely.
Having a little person in our household we still do the whole Santa thing, but we keep it very simple. Santa brings four presents, something you want, something you need, something to wear and something to read. I try very hard not to let anything that goes into a Santa sack be made from plastic unless it is Lego which I know will be used over and over for many years.
One area of Christmas that we can make a huge difference is how we wrap our gifts. Mountains of wrapping paper finds its way into landfill every Christmas and it is totally unnecessary. When I was a child (and I know I was not alone in this) my mother would recycle every piece of wrapping paper that came into our house. We were not allowed to rip open any presents, each one had to be very carefully opened to preserve the paper which had the sticky tape carefully removed and was then folded and put into a special box from which it was retrieved to wrap any outgoing gifts. Paper that was creased was ironed before it was reused and if an edge was torn it was carefully trimmed so it looked neat. It wasn’t about being environmentally friendly it was about frugality, an art we seem to have lost.
The gifts given from our family are all encased in handmade fabric bags that can be used multiple times. They can be washed and ironed and will look great for many years. I have a range of bags in Christmas prints, but I also use a variety of different fabrics for birthdays throughout the year and usually try to match the fabric to the interests of the recipient or to the gift it contains. The wrapping can become part of the gift, a storage bag for toys, a book bag or wrapping for another gift.
When my older children were little, we spent a fun afternoon with some butcher’s paper that I had been given and some red and green paint. I painted the kid’s feet and had them run along the paper, they then added handprints. Once the paint dried the paper was used to wrap the Christmas gifts for that year. We had a lot of fun and spent no money at all on our wrapping. Wrapping paper can be recycled or composted but you do need to remove the sticky tape first. An alternative to sticky tape is to use string or ribbon to tie up your presents.
A couple of years ago we started a new family tradition with a fun game we play rolling dice and opening and swapping presents according to the numbers rolled. I was concerned that the gifts used in the game would be junky plastic so we put rules around what could be given. Any item used had to be either purchased from an op shop, handmade or regifted. I ended up with a fabulous pair of salt and pepper grinders that were a regift but the most popular present and the one that a number of people wanted was an “Instant Golf Champion” pack. Purchased from an op shop for less than $5.00 it contained a golf club, trophy and a polo shirt embroidered with a golf club logo. The preparation for the game has become almost epic with family outings to op shops and plenty of discussion and much laughter.
Keeping gifts practical, useful, meaningful and things that are actually wanted will reduce some of the wastage that occurs with Christmas. If someone says that what they really want is a load of compost get them a load of compost. 1 dozen bags of Horse manure? -maybe don’t put it under the tree. Lamborghini – possibly not! You don’t have to spend a lot of money to make your gift meaningful.
Food is another area of massive waste at Christmas. With dogs, chooks, worms and compost there is very little food waste in this household, and we have worked hard to minimise our grocery costs which has flowed through to less food waste. Storing food correctly will decrease spoilage. Don’t over cater, buy enough for your needs but don’t overdo it. Ham is the perfect example of food that can be easily wasted. Don’t buy the biggest ham you can find, get one that will meet your needs. If you can’t bear the sight of another piece of ham slice or dice and freeze your leftovers for later use. Freeze the bone for Pea and Ham soup when the weather cools off.
Relax, prepare early, spend wisely and enjoy the season that is coming up rapidly.

Water is such a precious resource and one that we need to use very wisely. The ability to maintain a garden over an Australian summer can depend on your creative and clever watering techniques. In many places, water restrictions are very familiar and happen most summers. In some towns in New South Wales, it is predicted that water will run out by the end of this year. Perhaps we have splashed that precious resource around too freely in the past and we have certainly developed seriously bad habit’s in terms of water wastage.
Of course, there are things that we all should be doing as a simple matter of course. These are practices that should be second nature such as only watering in the early morning or evening, watering at ground level only, never leaving the tap running while you are cleaning your teeth and washing full loads of laundry only.
Installing rainwater tanks for garden watering is an excellent idea where at all possible. In the early 1990’s when we were building our first house and wanted to install rainwater tanks, we were not able to as it was against the bylaws at that time, can you believe that it was not legal to install a tank? I have also heard of towns where when piped water was connected, they were made to remove their rainwater tanks. Now we have tanks that will usually see us through the summer with wise watering practices.
Improving your soil by adding organic matter increases the water retaining ability of the soil which gives you an instant head start. Watering your seedlings less frequently encourages the plants to develop longer and stronger roots which decreases their dependence on supplementary watering. Mulching around your plants will help prevent your soil from drying out.
Put a bucket under your shower to catch your “warm-up” water and use that to water pot plants or garden beds close to your house. With only one person showering it is easy to gather several litres each day, with each additional person in the household will add several more litres of water available to water your garden. Keep a bucket in your kitchen and collect any left-over water from glasses and drink bottles, the water you use to cook vegetables etc and use for your gardens. Wash vegetables in a bowl rather than pouring water down the sink and use that water in the garden as well.
Dig a hole next to where you are going to plant more water-dependent plants such as tomato, zucchini, cucumber, etc. and bury a 2-litre plastic soft drink bottle up to the neck. Prior to burying the bottle use a pin and put multiple tiny holes around the bottom third of the bottle. Use a hose or a watering can and a funnel to fill the bottle as required. This will ensure that the soil around the roots of the plant remains damp. You can add liquid fertilizer to the bottle when desired to deliver a dose of goodness right where it works best.
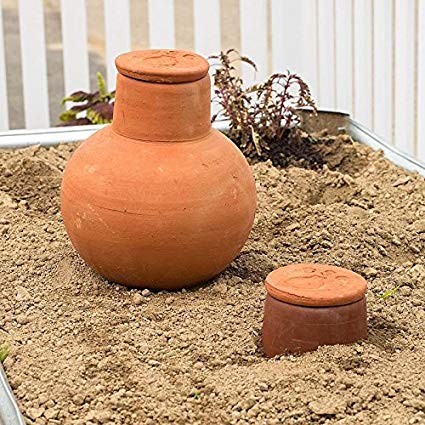
Ollas are unglazed terracotta pots designed specifically to be buried in the garden to keep the soil damp by water slowly leaking out. It is very difficult to purchase Ollas in Australia but if you have a potter as a friend, have access to a potter or are a potter, you are set. I tried a makeshift version one year with terracotta flowerpots with the drainage hole sealed with silicone and an old plate on top to reduce evaporation. It didn’t work out overly well and I found the plastic drink bottle worked much better. I have read of people who use traditional Ollas in the correct shape and have much better success with them. I am on the hunt for a potter who can make some for me -my skills with the clay would lead to horrendously wonky pots. Close monitoring of water levels is essential with either Ollas or bottles as complacency may lead to your garden drying out.

Wicking beds were developed in Africa as a response to the need to produce food in dessert conditions. The principle is the same as self-watering flowerpots with the plants accessing the water from a water reservoir via a wicking process.
A raised bed is required and can be built from any medium, I know people who have made wicking bed from old refrigerators, others from pallets and some from beautiful timbers. The outside doesn’t really count it is the inside that matters. The container needs to be sealed in the bottom third, builder’s plastic is good for this task. If using an old fridge, you won’t need to use plastic and if using something like a bathtub you will need to seal the plug hole. Place a piece of pipe with holes drilled into it along the bottom of the container with an upright piece of pipe joined to it and with the opening just above the soil surface. Fill the bottom third of the container with gravel or scoria, being careful to not pierce the plastic. Cover the top of the gravel with a piece of shade cloth or similar fabric to prevent the soil from infiltrating the reservoir area. Drill a hole in the bed just at the level where the gravel or scoria ends, this allows any additional water to escape and ensures that the bed will not flood. Fill the container with good soil of compost. Plant your seeds or seedlings and water in gently. If you are using seeds you will need to water gently from the top until the seeds germinate and reach the level of having their true leaves. Mulch the surface of the bed to reduce evaporation.
Once the plants are established you should only need to water the plants through the hosepipe. Fill the reservoir until water starts to run out the drain. The amount of water you need will depend on the dimensions of the wicking bed and the time between refills will depend on temperature and the type of plants, you will work out the requirements as you go.
I have made wicking beds successfully form polystyrene broccoli boxes with very good success. This method is great for growing leafy vegetables such as spinach and lettuce. Remember that you will always need to replenish the soil and fertilise regularly with this type of garden bed.
If you only manage to implement a couple of changes you are making a difference and saving water. Imagine if we all managed to change our practices, how green would our gardens be?
Whilst my last blog was all about upcycling for the garden and in all honesty, I will probably return to that particular subject again and again as I find upcycled garden items totally enthralling, this week I am having a look at upcycled items for the inside of the home.
With modern furniture and household items being quite cheap and not being built to last, many end up in landfill once their use-by date is up. Repairing furniture when it is cheap to replace may not seem worth the effort. A visit to a garage sale of a deceased estate sale will often turn up beautiful, well-built pieces of furniture that, with a bit of work can be unique and will last a long time.
I have a beautiful old dressing table that my Grandfather bought for me at a deceased estate sale when I was a teenager. He paid $5.00 for it. I sanded it back and refinished it and have used it ever since. It has moved with me from Tasmania to Western Australia and finally found its home in New South Wales. I had a drawer repaired once when I couldn’t get it sorted by myself, the cabinet maker who repaired it was loathe to touch it as he thought it was probably quite valuable. The craftsmanship is fabulous with fabulous dovetail joins all made from Tasmanian Oak. I have no idea how old it is but I imagine it is beyond vintage and into the antique range and it remains a beautiful and functional piece of furniture.
I am lucky enough to be surrounded by incredibly talented people who do all sorts of creative work with an amazing array of items. Their talents go way beyond sanding and refinishing a dressing table. I wish I had half their talent and was brave enough to try some of the projects they have undertaken.
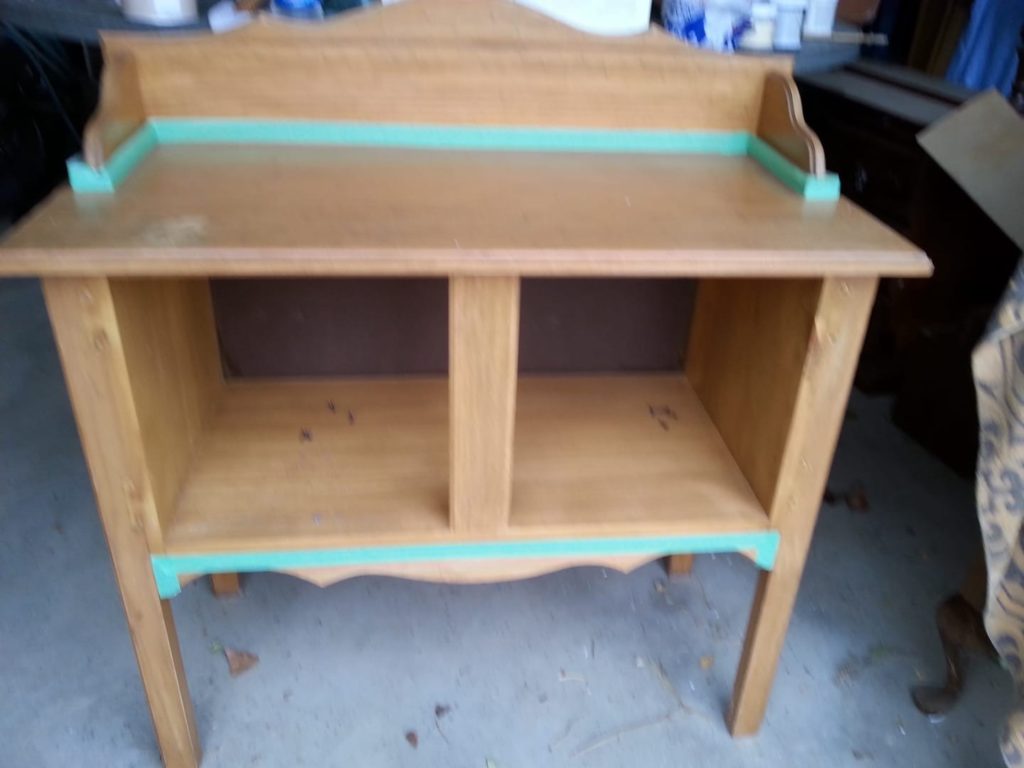
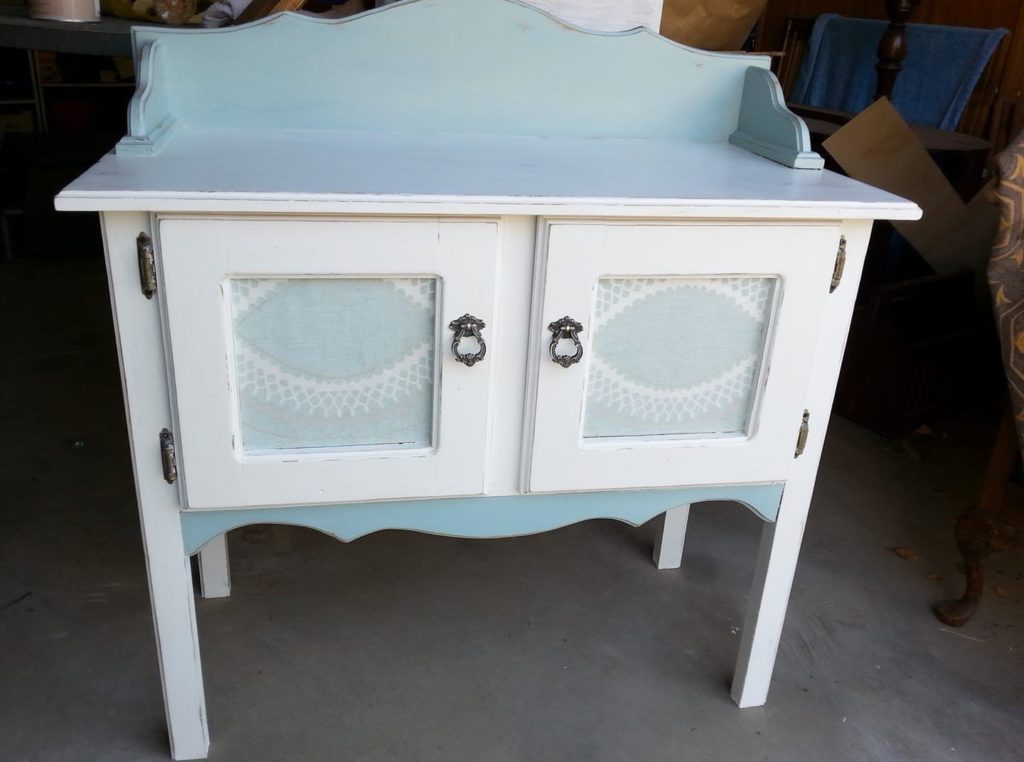
The gorgeous cabinet below was given a new lease of life by Bron. What a difference a good paint job with a couple of different shades makes. With handles that match the era and feature work on the glass in the doors, this piece would look at home just about anywhere.
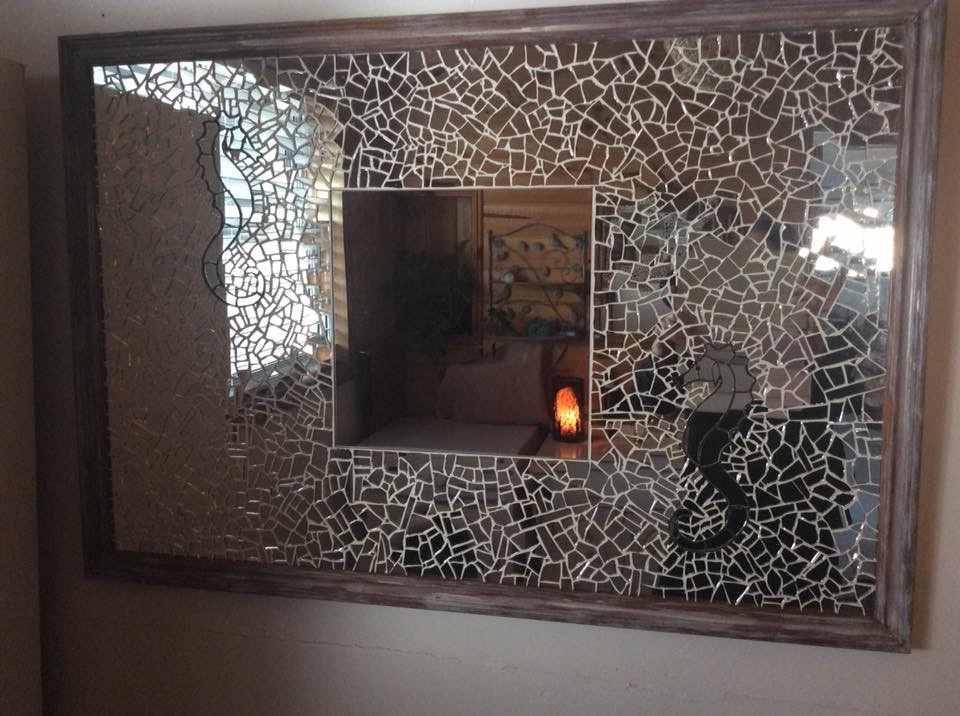
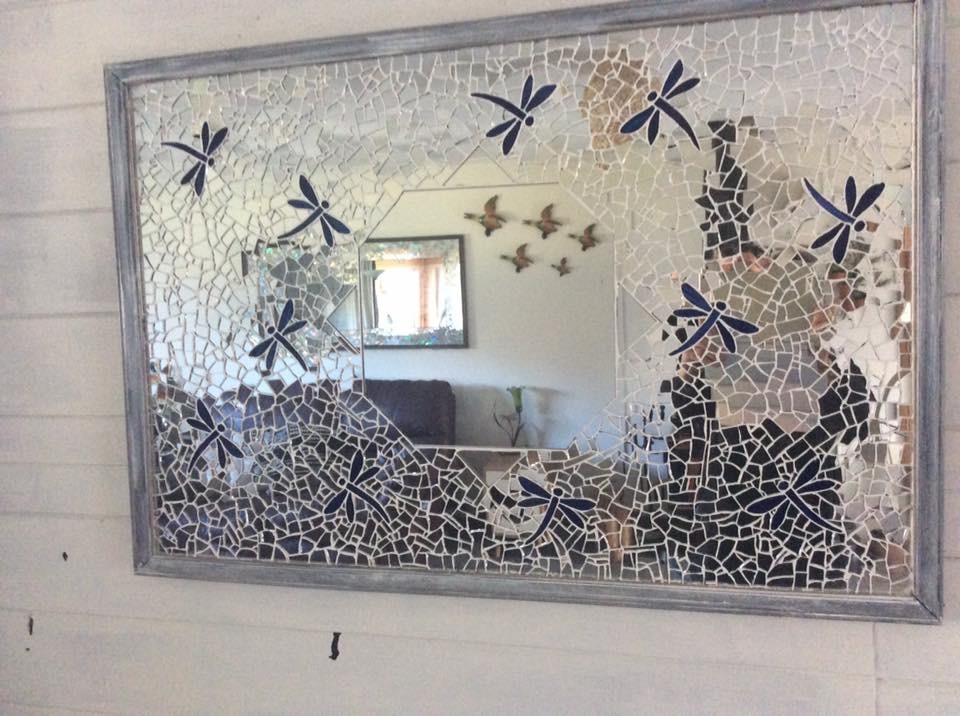
If you’re superstitious a broken mirror means seven years of bad luck. When my friend Kathi had a broken mirror, she took the pieces and used her incredible talent to make two new mirrors that are unique and pieces of art.
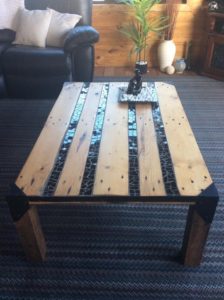
Kathi also made this coffee table using reclaimed pallet wood and black tiles. If you have ever tried pulling a pallet apart without damaging the wood, you will have the same level of admiration for Kathi as I do.
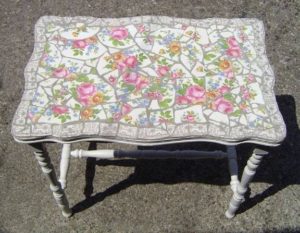
Another coffee table made into something very unique with the use of mosaic skills with broken china.
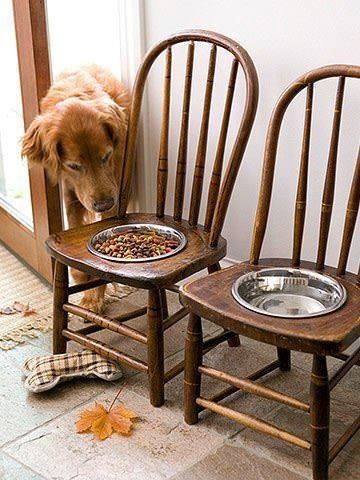
Need to keep the dog food off the floor? Simply find some old chairs, cut down the legs, add a hole in the seat the size of the food and water bowl and voila!

I don’t think this coat rack is made from reclaimed pallet wood, but you could use the same principle for a bespoke piece of furniture.
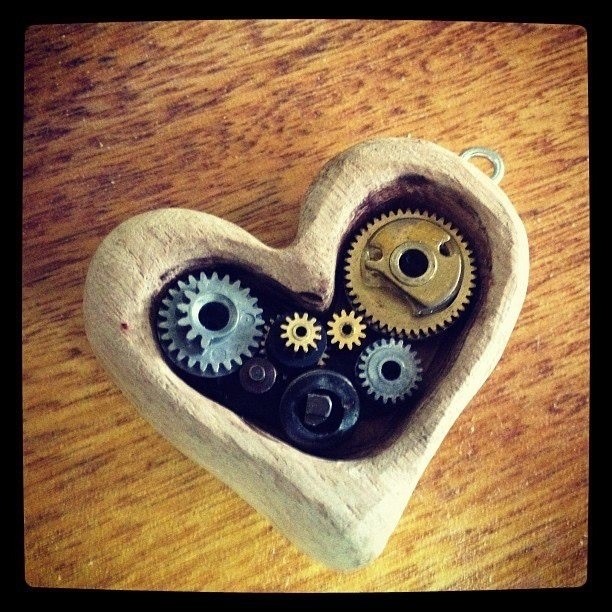
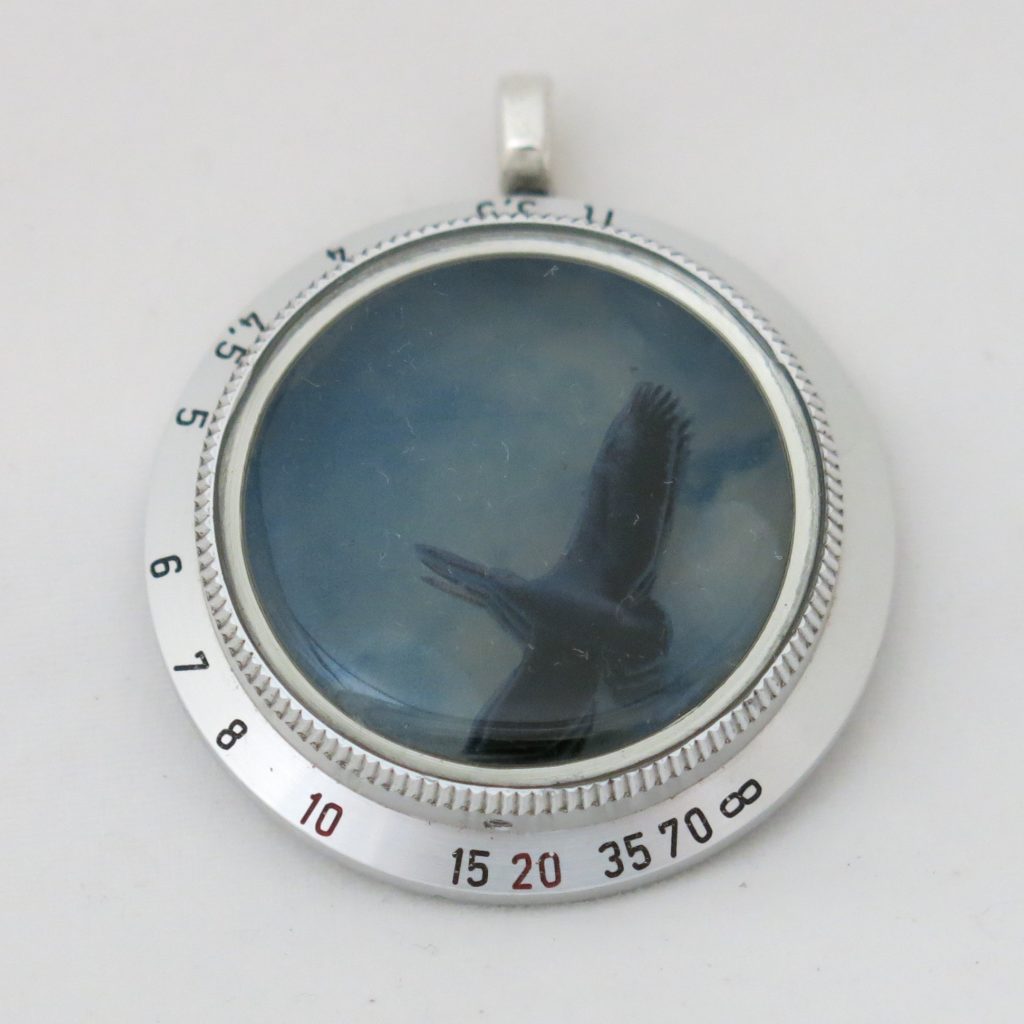
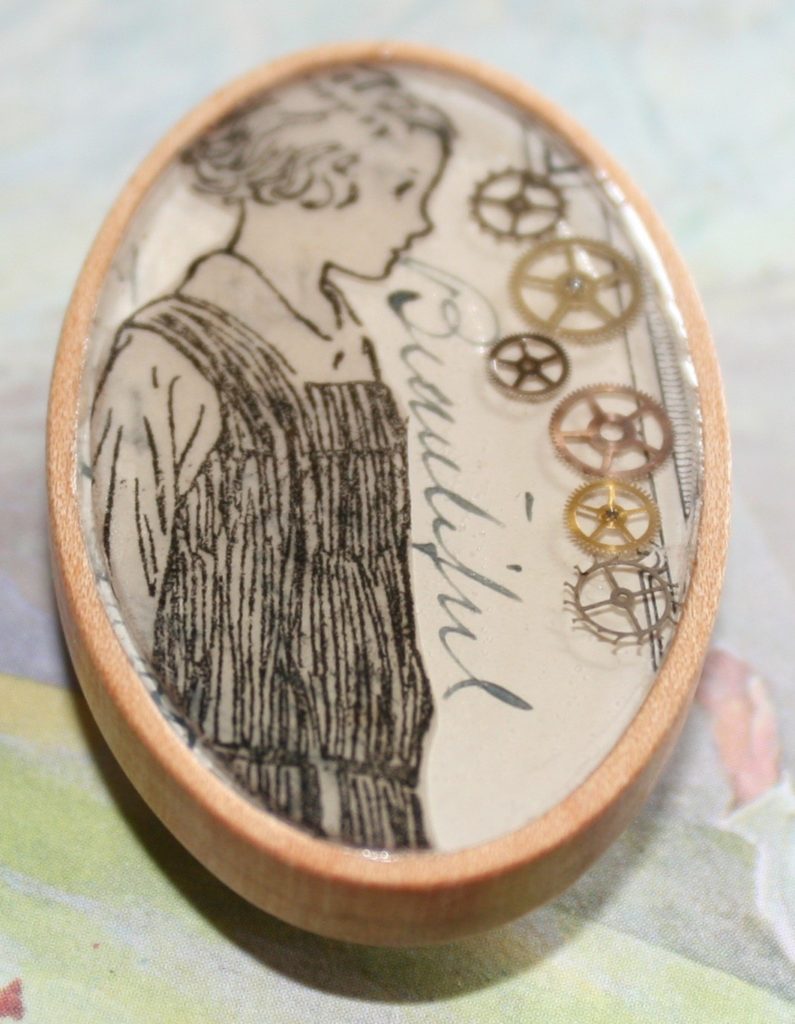
These pieces from Lovekin Designs are made using reclaimed items from old cameras and clocks. How beautiful are they?
Once you have seen some of the things that can be achieved through Upcycling you won’t look at old pieces of furniture, broken china or mirrors in the same way again.
We would love to see some of your upcycled pieces. If you would like to share photos, please add them in the comments on our Facebook page and share their story.
Photographs that are not credited and named are used with the permission of UPcyclity the UPcycling community on Facebook.
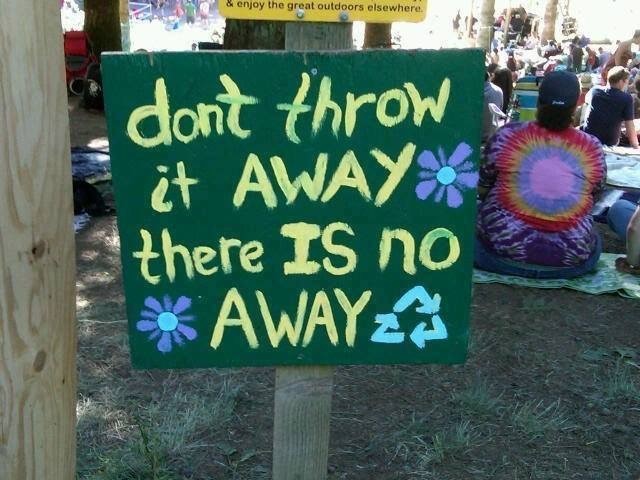
Photo heavy post!
Reduce, Reuse, Recycle – we hear and read it frequently and it makes perfect sense, although sometimes there is a fourth alternative – Upcycling.
Take an item that’s destined for the rubbish and, rather than sending it off to be recycled or disposed of on the tip, make something else out of it, something useful, something amazing and maybe beautiful.
Today’s blog post will focus on upcycling items for the garden but up has no limits almost anything can be upcycled. I have even seen floor mats crocheted from plastic shopping bags giving them a whole new and more functional life.
I love old tools. Many of my favourite tools are old and were repaired or had their handles replaced and are now serving me well. It would be lovely if I could say they were handed down to me from generations of avid gardeners from my family, who lovingly used and cared for them but that is not the case, they instead came to me anonymously without those stories that could have made them more special. They are, however, valued and they continue to work hard. My absolute favourite would be a 3-pronged hay fork. It had a broken handle and was rusty. Once cleaned up and with a new handle attached it has served me well moving straw around my garden and into my chook shed. I use a no-dig method of gardening these days but previously when I enjoyed digging in the garden, I routinely used a hoe to break up the surface and remove weeds such as Paspalum. The hoe was an old one from a clearing sale and it was fabulous to use, perfectly weighted and very effective. I would use a repaired and upgraded garden tool rather than buying a new one as a first option. Once tools are beyond repair they can be upcycled into many fabulous things.
Old garden tools are easy to find at Tip Shops, Recycling Centres, Garage Sales and Clearing Sales. If you are lucky enough to still have curbside rubbish pickups you may be able to spot them on the side of the road (just check that they are not just being rested while their operator is momentarily elsewhere!) They may not be perfect, but they will still have some sort of use. If they are no longer suitable or not needed as working tools, they are perfect for upcycling into garden art. Shovels and spades are the perfect size and shape for decorative animals, add a few other bits and pieces and you could have all sorts of amazing creatures in your garden.
Pinterest is a valuable resource for inspiration. I recently typed in “Shovel Garden Art” and hundreds of examples popped up. Ranging from very simple artworks -shovels with quotes printed on them, to incredibly intricate acid-etched artworks that belong in art galleries not gardens, you would surely be able to find something that suits your artistic skill level. Multiple hours could be wasted oohing and ahhing at the amazing upcycled tools at the very least, even if nothing gets upcycled at your place you will still get enjoyment from old tools.
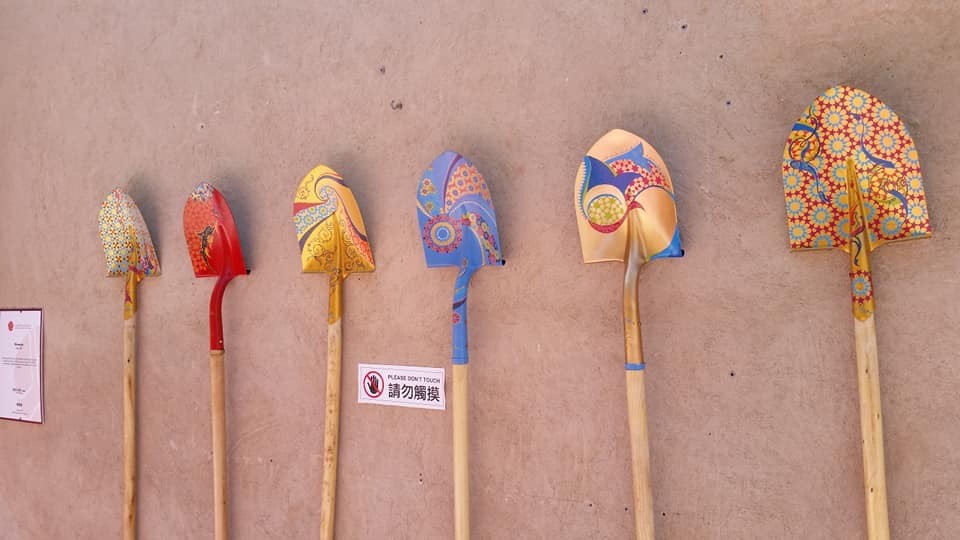
I wish I could say that the following photo of the colourful spades is my very own work but hey, when the painting genes were being handed out, I was in some other line! This photo was taken by a friend of mine at a market in Egypt. The sign probably says, “No photographs”. One day I am going to create one of these masterpieces, it may not be as special as these, but it will be colourful! I am keeping my eye out at Clearing Sales and the Tip Shop for a Shovel or spade to do just this, even without a handle I think it would look pretty good.
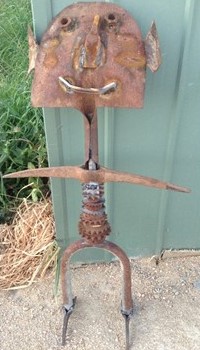
The objects de art (term very loosely applied) below were made by Colin Darts (coincidentally the well-travelled photographer mentioned above). Colin made a number of these as gifts for friends one Christmas. Those of us lucky to receive such a thoughtful hand-crafted present display them proudly.
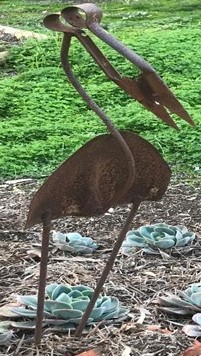

The next one, with the slightly wonky smile, was put together by my husband and graces my garden.
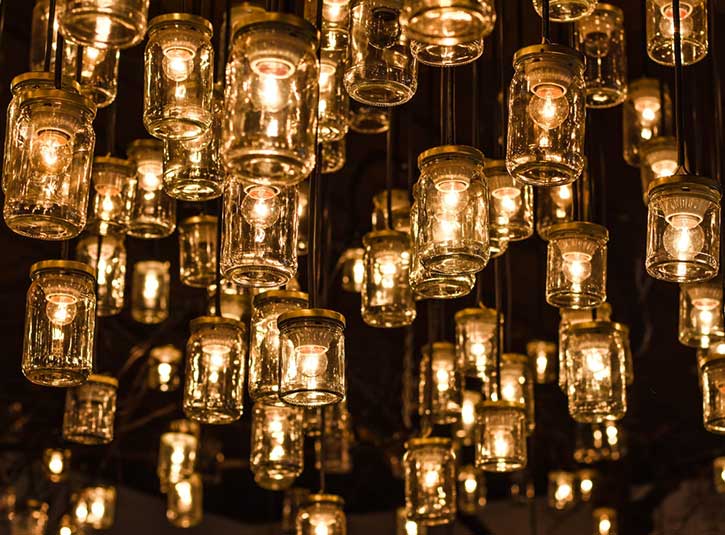
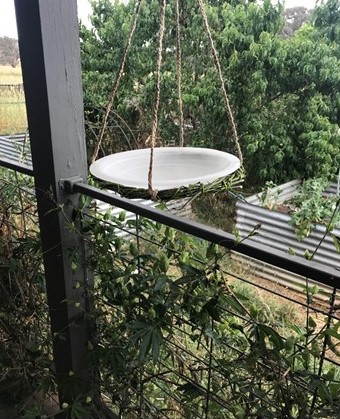
This birdbath/feeder was made from an old glass light fitting. A wreath of willow was woven for it to sit on (this has since dried to a dark brown colour) and string was braided to hang it. Many light fittings have a hole in the bottom of them, but I have found that if you get an old shot glass and attach it over the hole with silicone this will seal it but also adds a central perch for small birds. Fill it up with some flat pebbles or glass beads and you have a bee waterer.
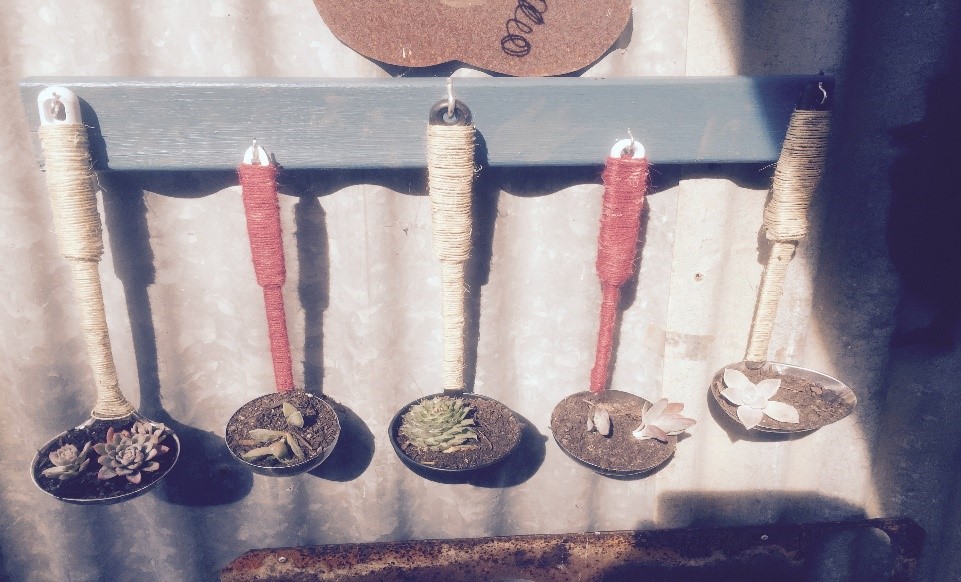
A piece of left-over wood from another project, painted with leftover paint, a few hooks, old soup ladels sourced from tip shops and Op shops wrapped in garden string. Add a small amount of compost and plant with small succulents. Hang it on an external wall for a piece of garden art.
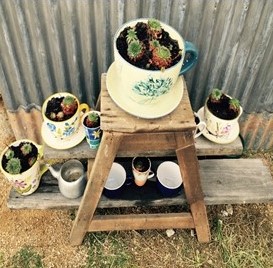
An old wooden step ladder with planks of wood resting on the rungs makes a pot plant display rack. Some of the cups are broken ones that were too colourful to throw away and others were gifts.
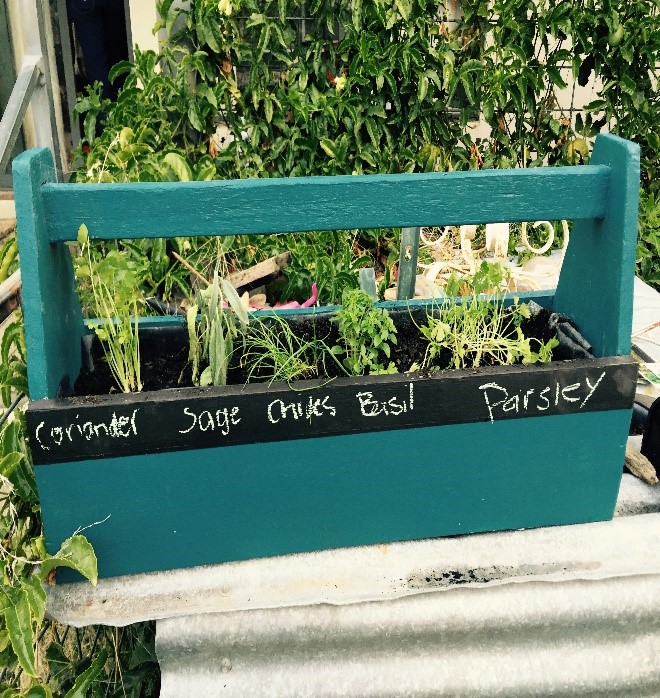
A salvaged toolbox (made by apprentices on rainy days to hone their skills), painted and with a strip of chalkboard paint added to allow for some personalisation makes a great portable herb garden. This one was lined with some surplus black builders’ plastic to protect the wood from excess moisture. It does have some drainage holes drilled into the bottom and corresponding holes in the plastic.
Upcycled pallets could take up an entire blog post by themselves so I will just pop in a couple.
I have found that pallets are available at all sorts of places and usually for no cost. I would recommend asking before just picking them up and taking them, but you will usually get a positive response.
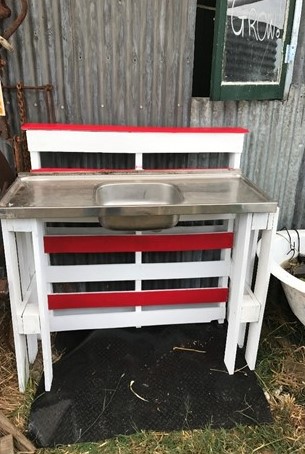
If you need a potting bench you can make yourself one for very little money. One full pallet at the back and another pallet cut in half and then cut off to the height that suits you with an old sink attached across the top. This one is painted because red and white look great and the paint was sitting in the shed, but it looks equally good left unpainted. I also like to paint pallets to give them some protection from the weather. Remember if you are using pallets for any food-related projects try to get the heat-treated ones.
Old sinks are also readily available, sometimes for free and sometimes for a small amount of money. Make friends with someone who does kitchen renovations and you may find you have a steady supply.
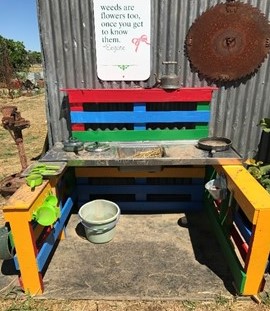
A similar process with one whole pallet at the back and two pallets cut down to the required size with a sink attached makes a great kid’s mud kitchen. This one was a Christmas gift and was painted to match a colourful fort that was already in existence. Don’t look too closely at the picture – it is obviously well used and loved. As it is designed to be used with water play, the paint provides additional protection to the pallets and should prolong its life a little.
Apologies for the long post I got carried away in my enthusiasm for upcycled garden art and equipment.
Next week part 2 will focus on upcycled projects and pieces that definitely don’t belong in the garden.
Confession time here – I have lots of weeds and I mean big industrial size weeds. I have a very large garden and I simply don’t have the staff (who am I kidding – I am the staff!) to manage it effectively. Be careful what you wish for, I wanted a large garden and I got one but the larger the area you have the more room there is for weeds to grow. Team that with the fact that I refuse to use herbicides and the outcome is that I have weeds. Another confession …. I don’t really mind having weeds as I can make use of all of them. Luckily I don’t mind a messy garden either so lots of weeds aren’t going to destroy my soul.
Change the way you look at weeds and managing them changes too. After all, weeds are simply plants growing where you don’t want them to grow. No plant is useless and even weeds have multiple uses for gardeners. View your weeds as a resource and you have something for nothing that you can make use of. We don’t have access to a green waste bin so green matter grown on our land needs to be managed on our land which has led me to find ways to use them.
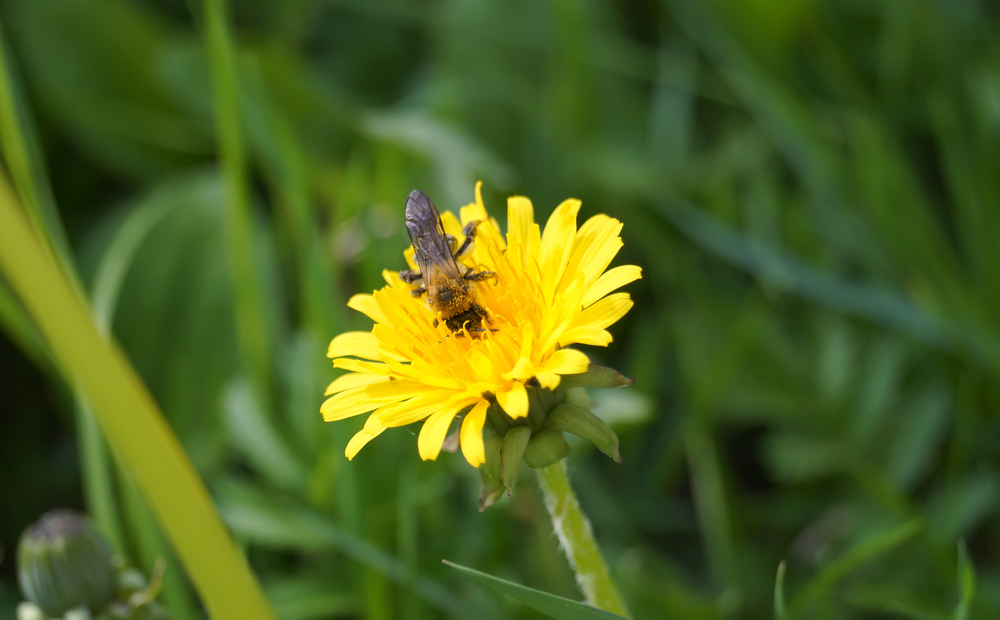
Sometimes just looking at a weed differently can change the value that plant has to you. Dandelions are weeds to many gardeners but they are also a useful plant. They flower when many other plants are not flowering providing food for bees and other beneficial insects. They are edible and nutritious for humans and animals. The flowers are pretty especially en masse.
Amongst the weeds that I don’t particularly like is Pattersons Curse – touching it irritates the skin and it is known to be an allergen for those with Hay Fever. I pull Pattersons Curse out before it seeds wherever possible.
Cape Weed smothers out all other plants but it is not too difficult to pull out and it also composts well.
Thistles and Bathurst Burr make my don’t like list, they hurt so they go.
Nettles are a plant on many peoples weed list however I like them although they also hurt. Nettles are a sign that your soil is full of nutrients. I had no nettles in my garden until the soil was rich and nutritious. Nettles are edible and high in iron and other nutrients that benefit us. Picking and preparing them may present more difficulty than picking Spinach but once they are cooked the sting disappears. Nettles stay a vivid green when they are cooked. Nettle and Fetta go very well together in fact, any recipe that calls for Spinach is great with Nettles instead. My daughter thinks that it is wrong to have to wear gloves to pick dinner but I think it is worth it. You can always pick them with tongs if you have misplaced your garden gloves.
Nettles also make a fabulous garden fertiliser. Simply pick a bunch of nettles and soak them in water for a number of weeks (warning the mixture will pong!) before diluting it 1 to 8 in water and pouring on the garden. This can be used as a Foliar Feed as well as pouring it straight onto soil.
It would be pretty difficult to compost effectively if you don’t have the green component. If you have chooks you are probably using many if not all your table scraps in your chook food. In this case, weeds become an essential compost ingredient. When I have an excess of weeds I have been known to put them around the base of bushes (not right up against the trunk) which works particularly well if the bush then hides the weeds. The weeds compost away under the bush feeding the soil while also acting as mulch and preventing the growth of more weeds.
When I want to extend a garden bed I often pile weeds from the bed on the end in the direction I want to extend and again the weeds are adding goodness to the existing soil and acting as mulch until I am ready to fully extend the bed.
I have a number of raised beds (just short of 1 metre high) that I call my old age beds as I will not have to bend over to plant or harvest them. There was no way I could afford to buy in enough soil to fill each of the beds so as they were made I would throw in weeds and keep topping them up as they compacted. It was slow but very effective saving me a great deal of money and giving me a very rich and nutritious soil.
After one too many loss of my chooks to foxes, I no longer allow the girls to free-range. They now receive a wheelbarrow full of weeds at least once per week which they enjoy hugely and after they have worked it all over it goes back out on my garden.